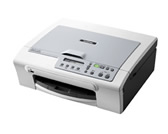
Downloads
Add Printer Wizard Driver |
How to Install
For Network Shared Printing:
*If your client PC has the same OS as the server PC:
- For Windows 2000 Users:
Click on "Start" => "Settings" => "Printers" => "Add Printer".
For Windows XP Professional/ XP Professional x64 Edition Users:
Click on "Start" => "Printers and Faxes" => "Add a printer".
For Windows XP Home Edition Users:
Click on "Start" => "Control panel" => "Printer and other hardware" => "Printer and Faxes" => "Add a printer".
Then click on "Next". - Select "Network printer" for the target printer and click on "Next".
- Input the Network Printer's Name, e.g. \\server\MFC-xxx
- Click on "Next".
- The Test print dialog appears. Click on "Next".
- Click on "Finish".
*If your client PC has a different OS than the server PC:
NOTE: There are some instances where you should follow the steps above, even if the client PC uses a different OS than that of the server.
- Make a temporary directory on your HDD to save the downloaded self-extracting file, e.g. C:\brodnt
- Start downloading.
- Once downloading is complete, double click on the downloaded file to extract it.
- For Windows 2000 Users:
Click on "Start" => "Settings" => "Printers" => "Add Printer".
For Windows XP Professional/ XP Professional x64 Edition Users:
Click on "Start" => "Printers and Faxes" => "Add a printer".
For Windows XP Home Edition Users:
Click on "Start" => "Control panel" => "Printer and other hardware" => "Printer and Faxes" => "Add a printer".
Then click on "Next". - Select "Network printer" for the target printer and click on "Next".
- Input the Network Printer's Name, e.g. \\server\MFC-xxx
- Click on "Next".
- Click on [Have Disk].
- Click on [Browse] and click on the drop down menu in the DRIVES field to select the folder created in Step 3.
- Click on "Open".
- Click on "OK".
- Select the model name and click on "Next".
- Name the printer. If you want to use the printer as the default printer, select "Yes".
- Click on "Next".
- Test Print dialog appears. Click on "Next".
- Click on "Finish".
For Local Printer:
- Make a temporary directory on your HDD to save the downloaded file, e.g. C:\bront
- Start downloading.
- Once downloading is completed, double click the downloaded file to extract it.
- For Windows 2000 Users:
Click on "Start"=>"Settings"=> "Printers" =>"Add Printer".
For Windows XP Professional/ XP Professional x64 Edition Users:
Click on "Start"=>"Printers and Faxes"=>"Add a printer".
For Windows XP Home Edition Users:
Click on "Start"=>"Control panel" =>"Printer and other hardware"
=>"Printer and Faxes"=>"Add a printer".
Then click on "Next". - Select the "Local printer" for the target printer and be sure to check off the "Automatically detect and install my Plug and Play printer" option.
- Click on "Next".
- Select a port and click on "Next".
- Click on [Have Disk].
- Click on [Browse] and click on the drop down menu in the DRIVES field to select the folder created in Step 3.
- Click on "Open".
- Click on "OK".
- Select the model name and click on "Next".
- Name the printer. If you want to use the printer as the default printer, select “Yes".
- Click on "Next".
- Select "Do not share this printer" or "Share as XXX" and click on "Next".
- The Test print dialog appears. Click on "Next".
- Click on "Finish".
Content Feedback
To help us improve our support, please provide your feedback below.
Step 1: How does the software on this page help you?
Step 2: If you have selected "Not helpful", choose from the following list that is close to your "Not helpful" reason. (multiple answers allowed)
Step 3: Are there any comments you would like to add?
Please note this form is used for feedback only.
