Downloads
Printer Driver & Scanner Driver for Local Connection |
How to Install
NOTE:
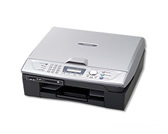
Unplug the FAX/MFC/DCP from the AC outlet and disconnect your FAX/MFC/DCP from your computer if you already connected an interface cable.
(For Windows 2000 Professional, you must be logged on as the Administrator.)
-
Make a temporary directory on your HDD to save the downloaded file, e.g. C:\bront
-
Start downloading.
-
Once downloading is completed, double click the downloaded file to extract it.
Note for English driver Users:
Two folders, "UK-ENG" and "US-ENG" may be created.
-The "UK-ENG" folder contains drivers written in English.
-The "US-ENG" folder contains drivers written in American English.
-
Connect the FAX/MFC/DCP to your PC by Parallel or USB Cable and turn on the FAX/MFC/DCP by plugging in the power cord.
-
When the "Found New Hardware Wizard" screen appears, click "Next".
-
Select (Recommended) and click "Next".
-
Check only "Specify a location" and click "Next".
-
Click on "Browse" and click on the drop down menu in the DRIVES field to select the folder created in Step 3. Click "Open", then "OK".
-
Make sure "Specify a location" is selected and click "Next".
-
Click Finish.
-
Repeat the steps from 5 to 10 two more times.
Content Feedback
To help us improve our support, please provide your feedback below.
Step 1: How does the software on this page help you?
Step 2: If you have selected "Not helpful", choose from the following list that is close to your "Not helpful" reason. (multiple answers allowed)
Step 3: Are there any comments you would like to add?
Please note this form is used for feedback only.