CS-6000/6000b/6000t/6000i
FAQs & Troubleshooting |
How do I wind the bobbin? (For models equipped with the fast bobbin winding system)
|
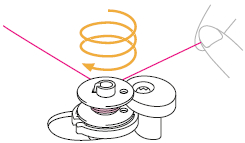
(1) Pre-tension disk (2) Bobbin winder shaft (3) Bobbin |

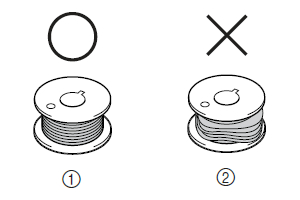
- Only use bobbins (part code: SA156, SFB: XA5539-151) that have been designed for this sewing machine. Using other bobbins may cause damage to the machine.
- We designed the bobbin that comes with this machine. If you use bobbins from other models, the machine will not work properly. Only use the bobbin that comes with this machine or bobbins of the same type (part code: SA156, SFB: XA5539-151).
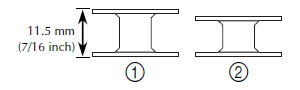
(1) This model (2) Other models
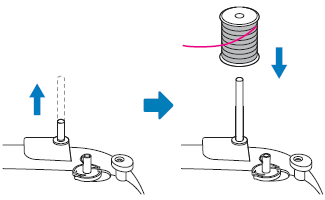
| 1. | Pull up the spool pin as far as possible, and then put a spool of thread on this pin. |
|
|
|
| 2. | Pass the thread around the pre-tension disk. |
|
Make sure that the thread passes under the pre- tension disk. |
|
|
|
|
|
(1) Pre-tension disk (A) Pulling it in as far as possible
|
|
|
If the spool of thread is not in the right place, the thread may tangle on the spool pin. |
|
| 3. | Place the bobbin on the bobbin winder shaft so that the spring on the shaft fits into the notch in the bobbin. |
 |
|
|
(1) Notch (2) Bobbin winder shaft spring
|
|
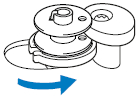
| 4. | Slide the bobbin winder shaft to the right. |
|
|
| 5. | While holding the thread that wraps around the pre-tension disk with your left hand, use your right hand to wind the free end of the thread clockwise around the bobbin five or six times. |
|
|
|
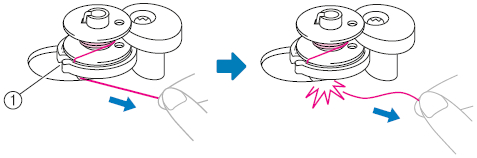
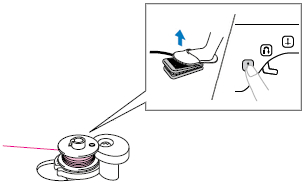
| 6. |
Pull the thread to the right and pass it through the slit in the bobbin winder seat. The thread is cut to a suitable length. |
 |
|
|
(1) Slit in bobbin winder seat (with built-in cutter)
|
|
|
Be sure to cut the thread as described. |
|
| 7. | Slide the sewing speed controller to the right (to set the speed to fast). |
 |
|
|
(1) Sewing speed controller
|
|
| 8. | Turn on the sewing machine. |

|
|
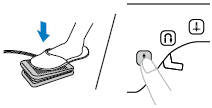
| 9. | Press the foot controller or press start/stop button to start. |
|
|
|
|
| 10. | When the bobbin begins spinning slowly, take your foot off the foot controller or press start/stop button. |
|
|
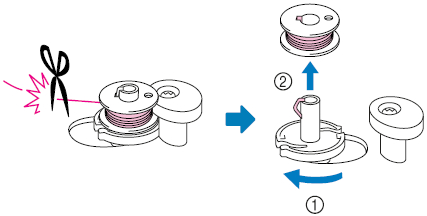
| 11. | Cut the thread, slide the bobbin winder shaft to the left and remove the bobbin. |
|
|
| 12. | Slide the sewing speed controller back to its original position. |
|
(1) Sewing speed controller |


Not winding the bobbin properly may cause the thread tension to loosen, and may break the needle.
(1) Wound evenly (2) Wound poorly
- When the sewing machine is started or the handwheel is turned after winding the thread around the bobbin, the machine will make a clicking sound; this is not a malfunction.
- The needle bar does not move when you slide the bobbin winding shaft to the right.