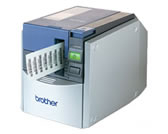
下载
适用USB或串行口连接的打印机驱动程序 |
如何安装
Printer Driver Installation
With a USB connection
With a Serial connection
*****************************************************************
With a USB connection
--------------------------------------------------------------------------
Printer Driver Installation
(With a USB connection)
Copyright (C) 2003 Brother Industries, Ltd.
--------------------------------------------------------------------------
****************************************************************************
Note:
* Before starting the installation, make sure that the PT-9500PC is not connected to the computer.
* Be sure to carefully read the installation procedure described below,
and connect the machine when you are instructed to do so.
In addition, quit all other applications before starting the installation.
* Place the downloaded file in any folder, such as [C:\WORK], decompress it,
and then start it up. If this operation is performed from the desktop, it may not start up correctly.
* Follow the procedure below when connecting the PT-9500PC to a computer using a USB cable.
Since the installation procedure is different if a serial cable is used to connect the computer,
be sure to follow the correct installation procedure.
In addition, a USB cable cannot be used to connect a computer running Windows 95 or Windows NT 4.0.
****************************************************************************
1. Make sure that the PT-9500PC is not connected to the computer.
2. Start up "dsetupl.exe" in the folder that was decompressed.
3. In the dialogue box that appears, allowing the type of connection to be chosen,
select "USB cable", and then click the OK button.
If the PT-9500PC printer driver has already been installed, continue with step 4.
If the printer driver is being installed for the first time, skip to step 9.
4. If a message appears, stating that an old driver has been detected,
click the OK button to close the message.
5. The Driver Setup (Brother PT-9500PC) dialogue box that appears allows you to select
whether to replace, add or delete the printer driver.
(If the choices are not available, skip to step 9.)
If the choices are available, select "Delete Brother PT-9500PC", and then click the Next button.
6. In the dialogue box that appears, asking for confirmation to delete the printer driver,
click the Yes button.
7. After the printer driver is deleted, a dialogue box containing the message
"Brother PT-9500PC was correctly deleted." appears.
If a dialogue box appears, explaining that the computer should be restarted,
select "Yes, restart immediately.", and then click the Finish button.
The computer is restarted.
If you are not prompted to restart the computer, click the Finish button, and then restart the computer.
8. After the computer is restarted, start up "Dsetupl.exe" in the folder that was decompressed.
In the dialogue box that appears, allowing the type of connection to be chosen,
select "USB cable", and then click the OK button.
9. In the Driver Setup (Brother PT-9500PC) dialogue box that appears, click the Next button.
10. A dialogue box containing the message "Preparing for setup..." appears,
and then the message "Preparation for setup is finished." appears.
Connect the PT-9500PC to the computer, and then turn it on.
11 .The driver for the PT-9500PC is automatically installed.
In the dialogue box that appears, containing the message "Brother PT-9500PC
was correctly added.", click the Finish button.
This completes the installation.
If the Add Printer Wizard started up without the PT-9500PC driver automatically being installed
(with Windows 98/98SE/Me), click the Cancel button to close the Add Printer Wizard.
Then, click the Finish button in the Driver Setup (Brother PT-9500PC) dialogue box, and restart the computer.
Afterwards, repeat the procedure from step 8.
******************************************************************
With a Serial connection
--------------------------------------------------------------------------
Printer Driver Installation
(With a serial connection)
Copyright (C) 2003 Brother Industries, Ltd.
--------------------------------------------------------------------------
****************************************************************************
Note:
* Follow the procedure below when connecting the PT-9500PC to a computer using a serial cable.
Since the installation procedure is different if a USB cable is used to connect the computer,
be sure to follow the correct installation procedure.
* Place the downloaded file in any folder, such as [C:\WORK], decompress it, and then start it up.
If this operation is performed from the desktop, it may not start up correctly.
****************************************************************************
1. Connect the PT-9500PC to the computer, and then turn on both machines.
2. Start up "dsetupl.exe" in the folder that was decompressed.
3. In the dialog box that appears, allowing the type of connection to be chosen,
select "Serial cable", and then click the OK button.
4. In the first Installer dialog box, make sure that "Install" is selected, and then click the Next button.
5. The next dialog box that appears allows you to select the port where the printer is connected.
Select "COM1:" if the PT-9500PC is connected to the COM1 port,
or select "COM2:" if it is connected to the COM2 port, and then click the Next button.
6. In the dialog box that appears, asking for confirmation on how the installation will be carried out,
click the Next button if the displayed settings are correct.
7. The printer driver is installed.
After installation is finished, "Start up the Change Baud Rate Wizard" can be selected.
* If "Start up the Change Baud Rate Wizard" was selected:
A. In the first dialog box of the Change Baud Rate Wizard,
you are asked to select the port where the PT-9500PC is connected.
Select the same port chosen in step 5, and then click the Next button.
B. In the next dialog box that appears, select the desired baud rate, and then click the Next button.
C. In the next dialog box that appears, click the Next button if the displayed settings are correct.
D. The settings are sent to the PT-9500PC to set the baud rate.
E.. After the baud rate is set, click the Finish button to quit the Change Baud Rate Wizard.
8. In the final dialog box that appears, click the Finish button, and then restart the computer.
内容反馈
步骤 1:本页上的软件对您有帮助吗?
步骤 2:如果您选择了“没有帮助”,请从以下列表中选择与您的“没有帮助”原因相近的选项。(可多选)
步骤 3:您是否有其它意见需要添加?
请注意本表格仅用于提供反馈。
